Flanger
It's a single-track effect. If you apply it to multiple tracks each will work on its own track independently of the others.
It consists of making a copy of the original sound wave and then playing it over the original one with a certain delay. The resulting signal (Output) will then be the sum of the two waves and will have peaks where the two values add up and gaps where the two values compensate each other. The result is a more evanescent and metallic sound. Much, however, depends on the intensity of the effect.
The delay introduced consists of two distinct components: the constant delay and the oscillating delay. Their sum constitutes the total delay of the effect (figure 10.19).
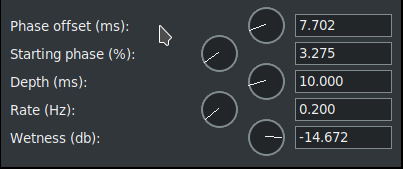
Figure 10.19:
GUI of configuration for Flanger plugin
|
|
- Phase Offset
- : it is the constant delay. Once set, its value does not change (unless we change it, for example by use of keyframes) for the duration of the effect.
- Starting phase
- %: is the point of oscillation where we start the oscillating delay; basically it is the attack value at which the effect starts the calculations. Not to be confused with the point on the timeline where we apply the effect. It only matches this for the 0% value. The position on the timeline where we want to start the flanger at a given starting phase value can be chosen using keyframes.
- Depth
- : It is the oscillating delay. This value determines the amplitude variation of the delayed (wet) signal phase. This oscillation will be maintained for the entire duration of the effect unless we change it.
- Rate
- : is the speed at which we apply the oscillating delay. Low values indicate a lower oscillation frequency, a high value a rapid succession of oscillations.
- Wetness
- : indicates how much of the original (dry) signal is taken into account compared to the delayed (wet) signal.
The CINELERRA-GG Community, 2021
https://www.cinelerra-gg.org