Initial Setup for DVB Capture
Listed below are the steps for the initial DVB setup. Setup will be preserved until you make changes.
- Start CINELERRA-GG, and click Settings
→ Preferences
→ Recording
- Select File Format checkbox: Realtime TOC (Table of Contents)
- It is not necessary to set File Format at this point as it will automatically be set later.
- Check Record Audio Tracks.
- Check Record Video Tracks.
- Select Audio In
→ Record Driver: DVB
- Set the adapter path = /dev/dvb/adapter0 (probably)
- Set the adapter dev = 0 (probably)
- Set the Bits: 16 Bit Linear (probably)
- Check: Follow audio config
- Samples read from device: 2048 or approximate dev buffer size (2k - 16k probably)
- Samples to write to disk: 131072 (a good size)
- Channels to record: 2
- Uncheck Map
5.1→2
- Gain: 1.0
- Uncheck: Record in real-time priority
- Select in Video In: Record Driver: DVB (note: File Format above changes to MPEG Stream)
- Set the DVB adapter path = /dev/dvb/adapter0 (probably)
- Set the adapter dev = 0 (probably)
- Check: Follow video config
- Frames to record to disk at a time: 30 (a good number)
- Frames to buffer in device: 2 (2 - 6 probably)
- Positioning: Presentation Timestamps (this is important and may not be already set)
- Uncheck: Sync drives automatically
- Size of captured frame: 720x480 (will automatically change)
- Framerate for recording: 29.97 (will automatically change)
- Click OK
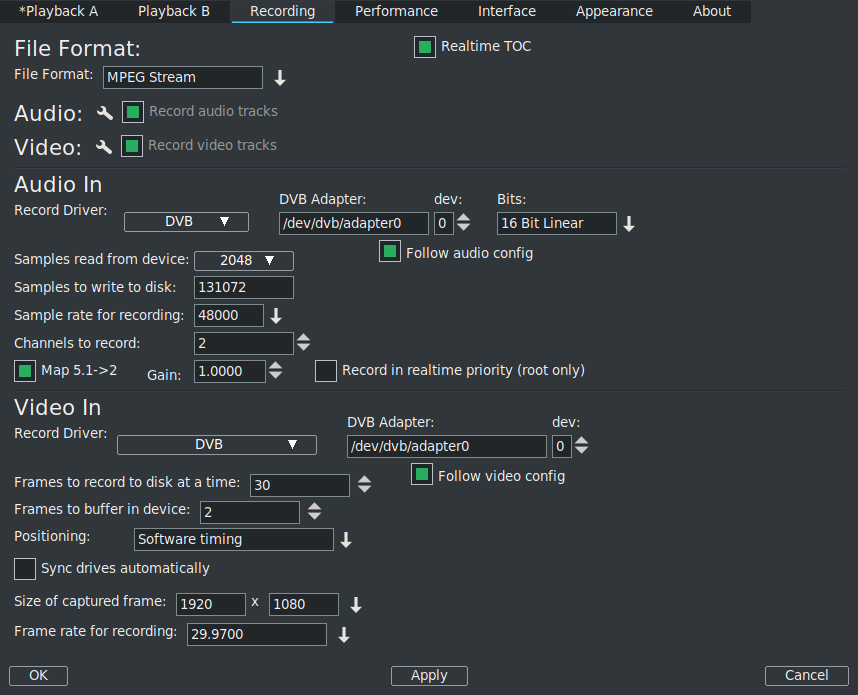
Figure 13.4 shows the Preferences window as a good example of what you should see.
Figure 13.4:
Example of the Recording settings
|
|
Scan the channels once the devices are setup by performing the following.
From the main window pulldown use: File
→ Record (lower case r) & resize windows.
- Two windows appear – the Recording and the Video In. The Recording window should have Monitor video checked and Monitor audio unchecked. Remember to check the Monitor audio later when you want to listen to a TV program.
- On the Video In toolbar, click the antenna button (Edit channels tool tip).
- When the Channels window opens, click scan – Scan confirm window appears.
- Make sure Freq table NTSC_DVB, Norm NTSC, and input0 are chosen automatically.
- Click OK and then wait for scan to end which may take several minutes.
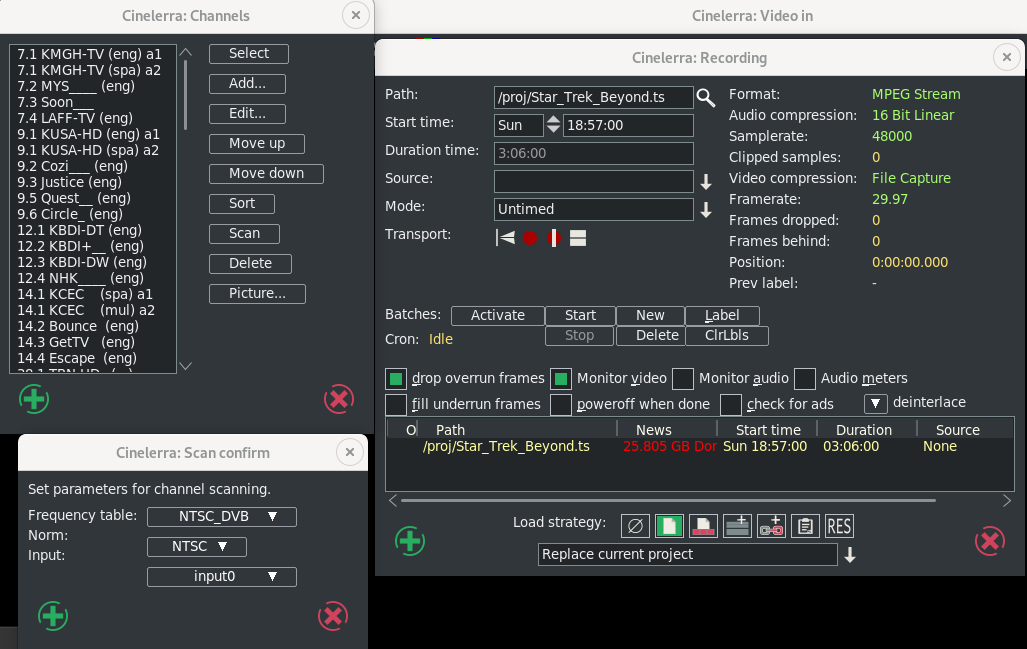
Figure 13.5 on the left shows the Channels window and the popup waiting for scan confirmation. On the right side is the usual Recording window with the Video in window hidden behind.
Figure 13.5:
Clockwise: Channels window; Video In (behind); Recording and Scan confirm
|
|
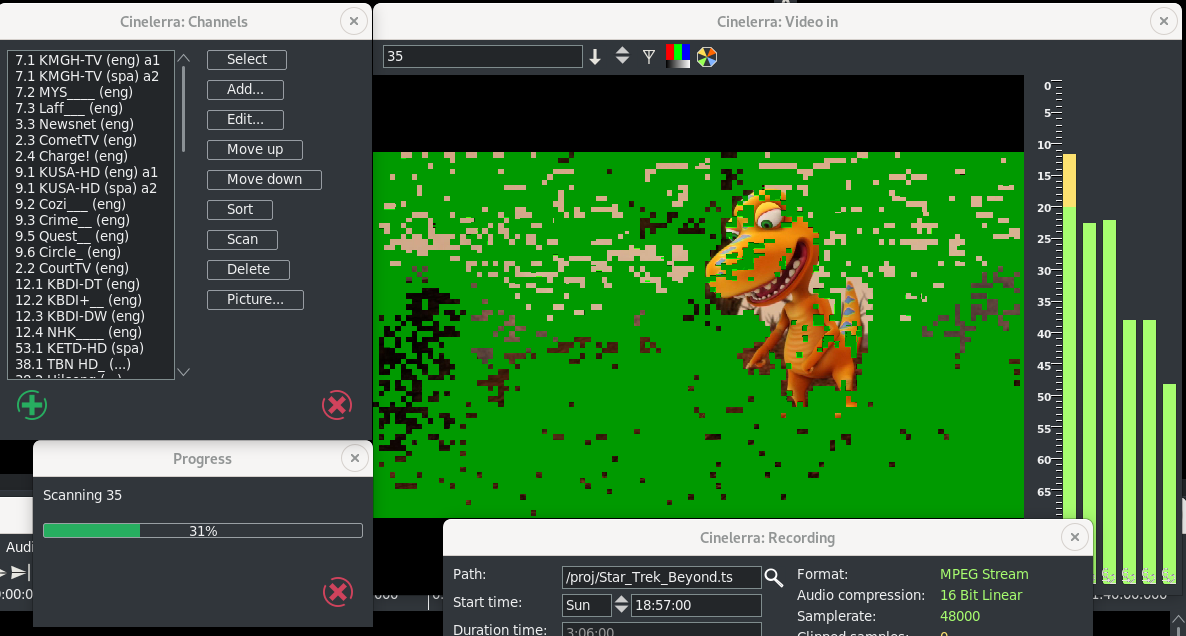
Figure 13.6 shows scanning in progress. Note the Video In with the antenna icon (3rd symbol).
Figure 13.6:
Scanning in progress (31%)
|
|
Any time after the channels have been scanned, you can edit them from the Recording window channel selection dialog (shown on left of screenshot above, such as Sort). You do not have to scan the channels every time as they are saved in a database referred to as the channel-db.
- Click chk-OK when done scanning channels and making any edits you want.
After the channel-db is ready, you can watch any of the selectable channels.
The CINELERRA-GG Community, 2021
https://www.cinelerra-gg.org