Next: CINELERRA-GG Command Line -h Up: Troubleshooting and Help Previous: When things go wrong Contents Index
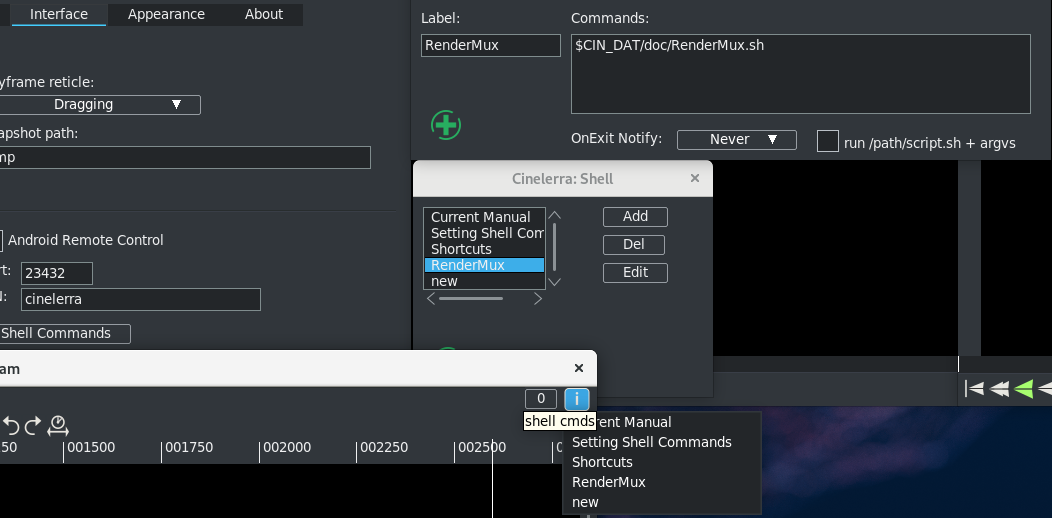
In order to provide some types of help, the Menu Bar Shell Commands are available for customization purposes (figure 18.1).
In the main window on the top line containing the File, Edit, ... Window pulldown menus, all the way to the right hand side is the shell cmds icon. You might see a small white-color bordered box with the "i" inside and if you mouse over it, the tooltip says shell cmds. This is a configurable popup which gives you the ability to see a table of Shortcuts in html format, refer to the reference manual or execute a pre-defined script to perform a specific task, such as some type of post processing which you plan on performing on a repeat basis. Unless redirected elsewhere, the output from executing any script-type commands will be displayed in the window from where you started CINELERRA-GG.
The Shell Cmds popup menu items are configured in:
Settings → Preferences → Interface → Shell Commands
This runs a dialog that lets you Add/Del/Edit the scripts in the main menu popup. Possible options are:
Next time you click on the shell cmds icon, you will have the changes you made in effect.
Both the Add and Edit options have checkboxes in the Commands window for the following:
When modifications to the Shell Cmds are included in a new CINELERRA-GG release, they are not added to your Preferences file automatically unless you create a new one. But if you have added no custom scripts, you can update your currently existing $HOME/.bcast5/ CINELERRA-GG_rc file to delete the lines that are all grouped together that begin with the letters: SHBTN (the entire line – these are the SHell BuTtoNs). You should first Quit out of CINELERRA-GG, edit the file, and then when you restart CINELERRA-GG, it will create the new default buttons in that same file.
There are 2 specific CINELERRA-GG file names that have unique characteristics that allow for usage from a user-defined script. The first one is an environment variable, CIN_RENDER which is used in the RenderMux shell command that is already setup. It contains the complete path and filename of the file in your session that you selected as Select a file to render to when you ran a Render operation.
The second one concerns usage of the Resource window assets to use as argvs in shell scripts. The added command line can ONLY be a script. Then if your script refers to $1, $2 and $3 and you highlight 3 files in the Media folder, their full path name will be used as the argvs to your script. For example, if you added a shell commands script /workspace/script.sh that contains the following lines:
cp “\$1” /tmp/temporary_copy cp “\$2” /tmp/new_copy cp “\$3” /tmp/file_to_upload |
and you highlight 3 files in the Resources window called ABC.mp4, 123.mp4, and Final.mp4 and execute your added script from the Shell Cmds icon, you will be copying those 3 highlighted files to the new names on /tmp.
There are some Help features currently included in the Shell Cmds menu. Those available are: