Next: Audio Transitions Up: CinelerraGG_Manual Previous: Rendered Video Effects Contents Index
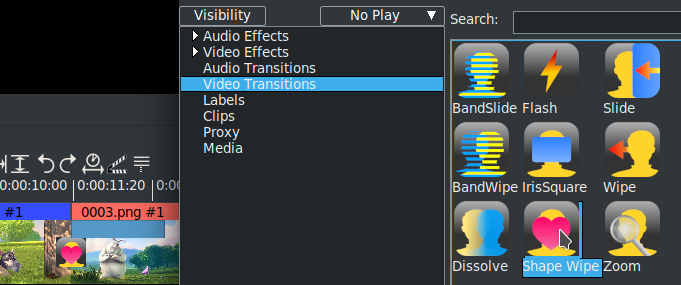
When playing a section of media where one edit ends and another edit begins on the timeline, the usual result is that the first edit's output immediately is followed by the second edit. Transitions provide a better method whereby the first edit’s output becomes the second edit’s output. There are several different audio and video transitions listed in the Resources window as figure 11.1.
Note the bluish colored bar above the Shape Wipe transition. This bar near the transition symbol shows the position and the length of the transition. We can extend or reduce the length of the bar (and therefore the duration of the transition) by simply dragging the right edge of the bar to the desired position. In the zoom bar, at the bottom left where the words Welcome to Cinelerra appears, this is replaced by the real time length of the bluish bar. The unit of measure adopted is that of the timebar –the default is hh:mm:ss:frame; we can change it as we like (RMB on timebar).
Transitions only apply to the matching track type; that is audio transitions only apply to audio tracks and video transitions only apply to video tracks.
An example usage of a transition follows:
There are some shortcuts to alleviate the dragging and dropping of transitions when you want to do a lot of them in various places on the timeline. After you have established the parameter values for a transition that you have dragged from the Resources window, you can use "U" and "u" keys to paste the same transition; the "U" key pastes the last video transition while the "u" key pastes the last audio transition on all recordable tracks. Alternatively, you can add the same transition to multiple edits when in Arrow mode (Drag and Drop editing), by selecting edits to add the transition to and use the Video/Audio pulldown to Attach transition. Select the desired transition and then click the checkmark OK. You can set a default transition in the Attach transition popup box – by highlighting your choice, then click on the button Set Default Transition, and you will see that transition become the new default.
The way that transitions work is that two edits overlap for some length of time and no edits are actually moved during the transitions. Instead extra frames from the source file will be used to lengthen the first edit enough to make it overlap the second edit for the length of the transition. The transition takes effect exactly at the beginning of the second edit and lasts for the specific length of time you set into the second edit. What this means is that if you set a duration of 2 seconds for a flash transition, it will not start at the last 1 second of the first edit and continue 1 second into the second edit. Instead the transition will start exactly at the beginning of the second edit and last for 2 seconds into that second edit. This is why it is necessary that the first edit needs to have extra data after the end boundary to provide enough fill for the transition length into the second edit. In the case where the last frame on the timeline is the last frame of the source, CINELERRA-GG will lengthen the first edit using only that last frame. The result will not be what you want because the first edit will freeze into the transition.
When playing transitions, software rendering is used. This means that if you are using hardware, as with the video driver set to OpenGL, hardware acceleration will usually be turned off during the transition and on after the transition. Consequently, you may notice small anomalies while playing this section but you can avoid this by switching to using X11 video driver instead or just ignore it because when you create your final render that is always done in software only.
When Info on is enabled via the right mouse button over an empty space in the Resources window (or the shortcut of the letter “i” is used), a short description will be provided in the lower right hand corner of that window for the current transition that the mouse is on.
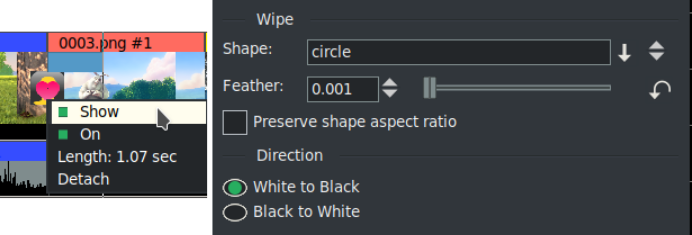
Once you have dragged and dropped a transition to the timeline, right mouse click on the transition and a pop-up menu will appear which provides an opportunity to make some changes. These are described next for all video and audio transitions (see figure 11.2).