Next: Color 3 Way Up: Video Effects Previous: Chroma Key Contents Index
Chroma Key (HSV)9 (figure 10.30) replaces a color with another color or transparency using HSV variables; it is frequently used to remove a color from a video to composite with another image. This process is generally referred to as green screen or blue screen process (because of the background color that is keyed out). More information: http://en.wikipedia.org/wiki/Chromakey
The subject in the movie should have a good background. The lighting is crucial and good lighting during production will save you time with much less effort than in post-production. Another tip is to use a low-compressed, intraframe codec with as high a color depth as possible. In case of YUV-type source signal, it is better to have subsampling 4 : 4.4 or 4 : 2 : 2. Here we assume that we have a good video, filmed on green (or blue) screen that we want to use. Important: Make sure you are using a color model that has an alpha channel, such as RGBA8, RGBAFloat, YUVA8. To change color model, go to Settings → Format → Color Model.
As in any other effect, add it to the timeline in the main window. You can tweak each parameter in order to improve the keying.
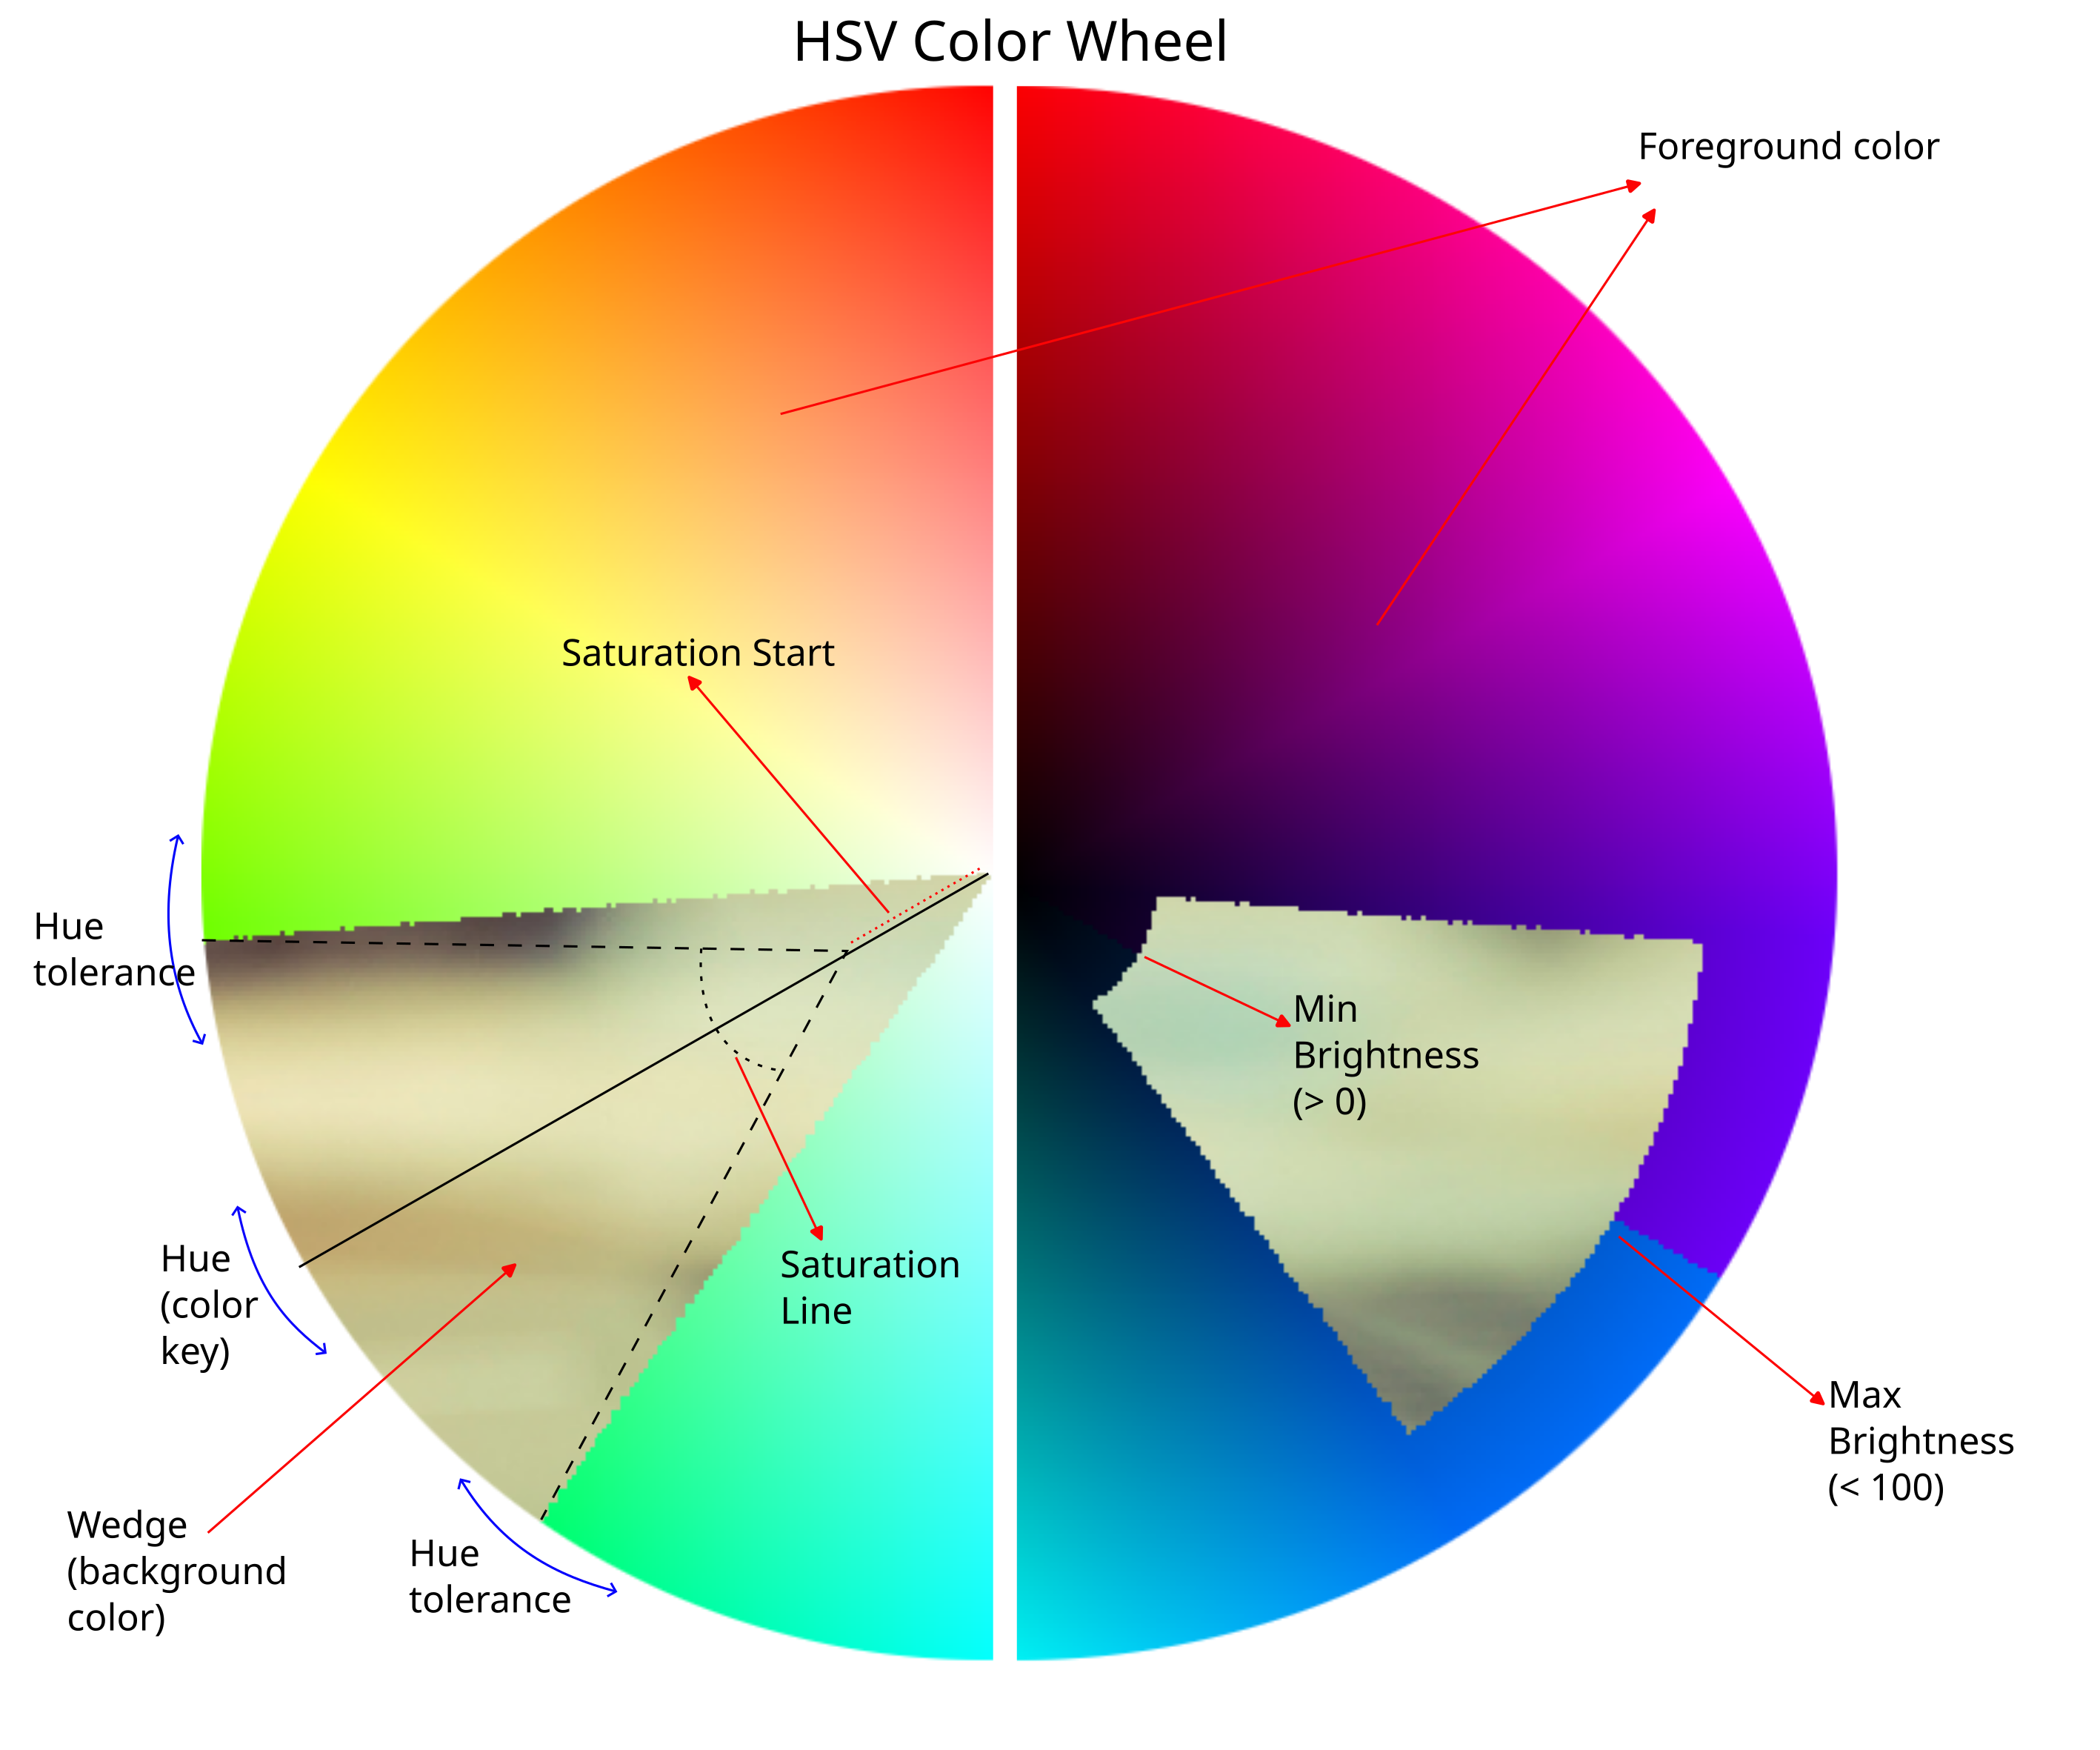
To understand how the plugin parameters work, we need to refer to the HSV color wheel (foreground color) in figure 10.31. Coinsider that this is an abstract example; in the real world we will be dealing with much more complicated masks.
The left half has Saturation from 0 (in the center) to 100 on the edges. An example of a green screen is shown here. The right half has brightness from 0 (center) to 100 on the edges. The example of a blue screen is given here. The key color is the radius of the wheel, and its angle determines the hue. The Hue Tolerance is the arc of a circle (a wedge) that includes the radius. The wedge is the color range (mask) that we want to eliminate by keying, its shape is precise and easy to understand. The Brightness are the inner/outer extremes of the wedge; if the inner value (Min) is 0, then it coincides with the center point, if the outer value (max) is 100 then it coincides with the arc on the circumference. With intermediate values we will have masks similar to the one shown in the figure. Min Saturation is the distance from the center, along the Hue radius, from which we want to impose saturation with the value 0. It will be the value from which keying starts. Saturation Offset is an additional cut we make to the inner part of the wedge from the Min Saturation value. All of these adjustments allow us to establish a range of colors (Mask) that perfectly matches the background (the wedge in the example in the figure) that we want to eliminate. This is a precision operation, and it is not rare to return to the parameter combination several times to refine the mask.
Start with Hue Tolerance at 10%, Min Brightness at 0, Max brightness at 100%, Saturation offset at 0, Min Saturation at 0, In Slope at 0, Out Slope at 0, Alpha Offset at 0 (that’s mid-way through), Spill Threshold at 0, Spill Compensation at 100%. At any time, you can check what the Mask looks like by clicking on Show Mask. This will output a black and white image of the mask (matte).
Color section
In this section of the configuration window, you choose the key color and have the ability to see the mask created.
Key parameters section
In this section we expand the mask to a range of colors close to color key and refine the selection by also taking advantage of brightness and saturation.
Check what it looks like at this stage, your mask should be pretty clean. Toggle Show Mask to check what it looks like, it should be OK. If not, repeat steps 1to4 to get a better key. The rest of the controls are useful to smear the mask to help compositing later on. They will help you to make your key look much cleaner.
Mask tweaking section
In this section you intervene on the already created mask with edge smoothing and transparencies.
Spill light control section
In this section we try to make halos, reflections and parasitic lights present on the foreground less noticeable.
Now the mask is probably still very harsh, so just below the Chromakey (HSV) plugin, add a Blur effect, and select only the Alpha channel, with a radius of 2 or 3 (more if you really want to soften the edges). This will significantly help the keying.