Next: Options in both the Up: Interface (the 4+ Windows) Previous: Cropping Contents Index
The Viewer window (figure 2.18) is convenient for previewing your media and clips. It can also be used for editing with cuts and then paste operations into the timeline or to create a clip. There are transport buttons to use in the same manner as in the Program and Compositor windows or you can quickly move through the media by dragging with the LMB in the timebar above the transport buttons.
In order to view media in the window, you have to load it as follows:
Note that you can have multiple Viewer windows open with different or even the same media asset. After the media is loaded you can use the transport buttons to play, rewind, stop, and so on, or for fast previewing drag with the LMB anywhere on the timebar slider. There is also the Videoscope button which is to used to enable the scopes window without having to apply the filter to the tracks/edits. A few more options available in the Viewer window can be accessed with a RMB click on the display . These functions are listed next.
The Viewer uses the project's output size format settings that is in effect to display the media instead of the original asset's format. Operations performed in the Viewer affect a temporary EDL or a clip rather than the timeline. By default, the Viewer window is automatically available but if it gets accidentally closed you can open it again by using the pulldown Window → Show Viewer to bring it back up. More details for editing in the Viewer window with the Two Screen Editing method is explained in 5.3.

|
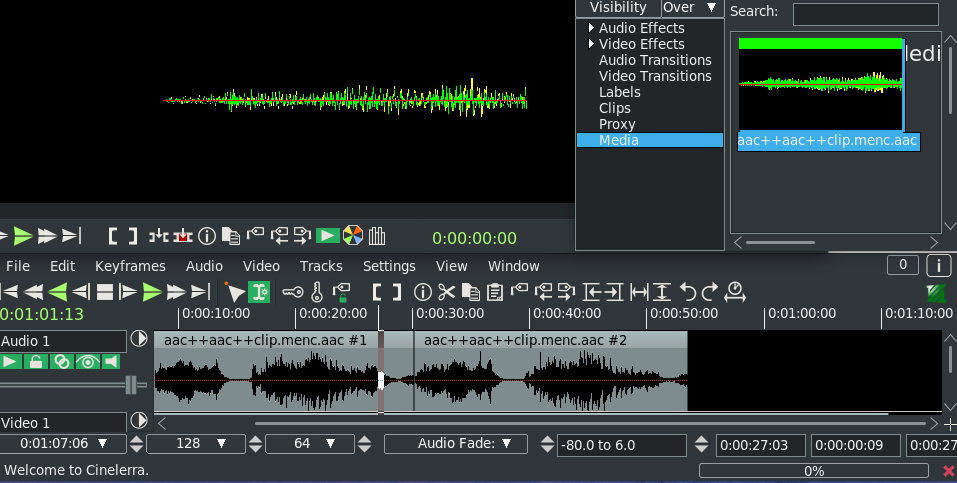
You can also use the Viewer to listen to media that consists only of Audio. This is a quick way to listen to the audio to see if it is what you would like to add to a timeline audio track for your project. To do this, you simply drag the audio file from the Resources window in the same manner as a video file. The viewer was designed to "view" images rather than play audio so in order to make it obvious that audio media is loaded to the viewer, a waveform is displayed that is the same waveform as shown in the Resources window thumbnail when in the Display Icons mode. This waveform only represents the first 5 seconds of the media and will not change or move while playing in the Viewer window. But you can play the entire piece of media in the window and as you do so, you see the play cursor line move along and the timestamp reflect the actual position. You can also create clips. The entire waveform can only be seen on an actual audio track on the timeline. An example of what this looks like is shown in figure 2.19.
The CINELERRA-GG Community, 2021