Next: Using Screen Capture on Up: Editing: real-world usage cases Previous: Workflow with Keyframes and Contents Index
In CINELERRA-GG it is quick and easy to create Picture-in-Picture (PiP) using the Camera and Projector tools. You can read about how to use these at Camera and Projector.
PiPs created with Camera and Projector, however, do not have a frame. You can add it with the Sketcher plugin that allows for drawing on the canvas of the Compositor window. Such a frame remains fixed in the position where it was created and can only be moved manually, with a movement that must be in accordance with the movement of the PiP. Unfortunately, this is very complicated and imprecise work. A convenient workaround is to use the Sketcher plugin together with the Crop&Position plugin. Here is a description of how to do this.
Consider an example of a main video (bbb_sunflower_1080p_30fps_ normal.mp4) and a still image example (Rodents.png). You want to insert a crop of the image surrounded by a colored frame inside the video. Later you can move the PiP with its frame by using keyframes.
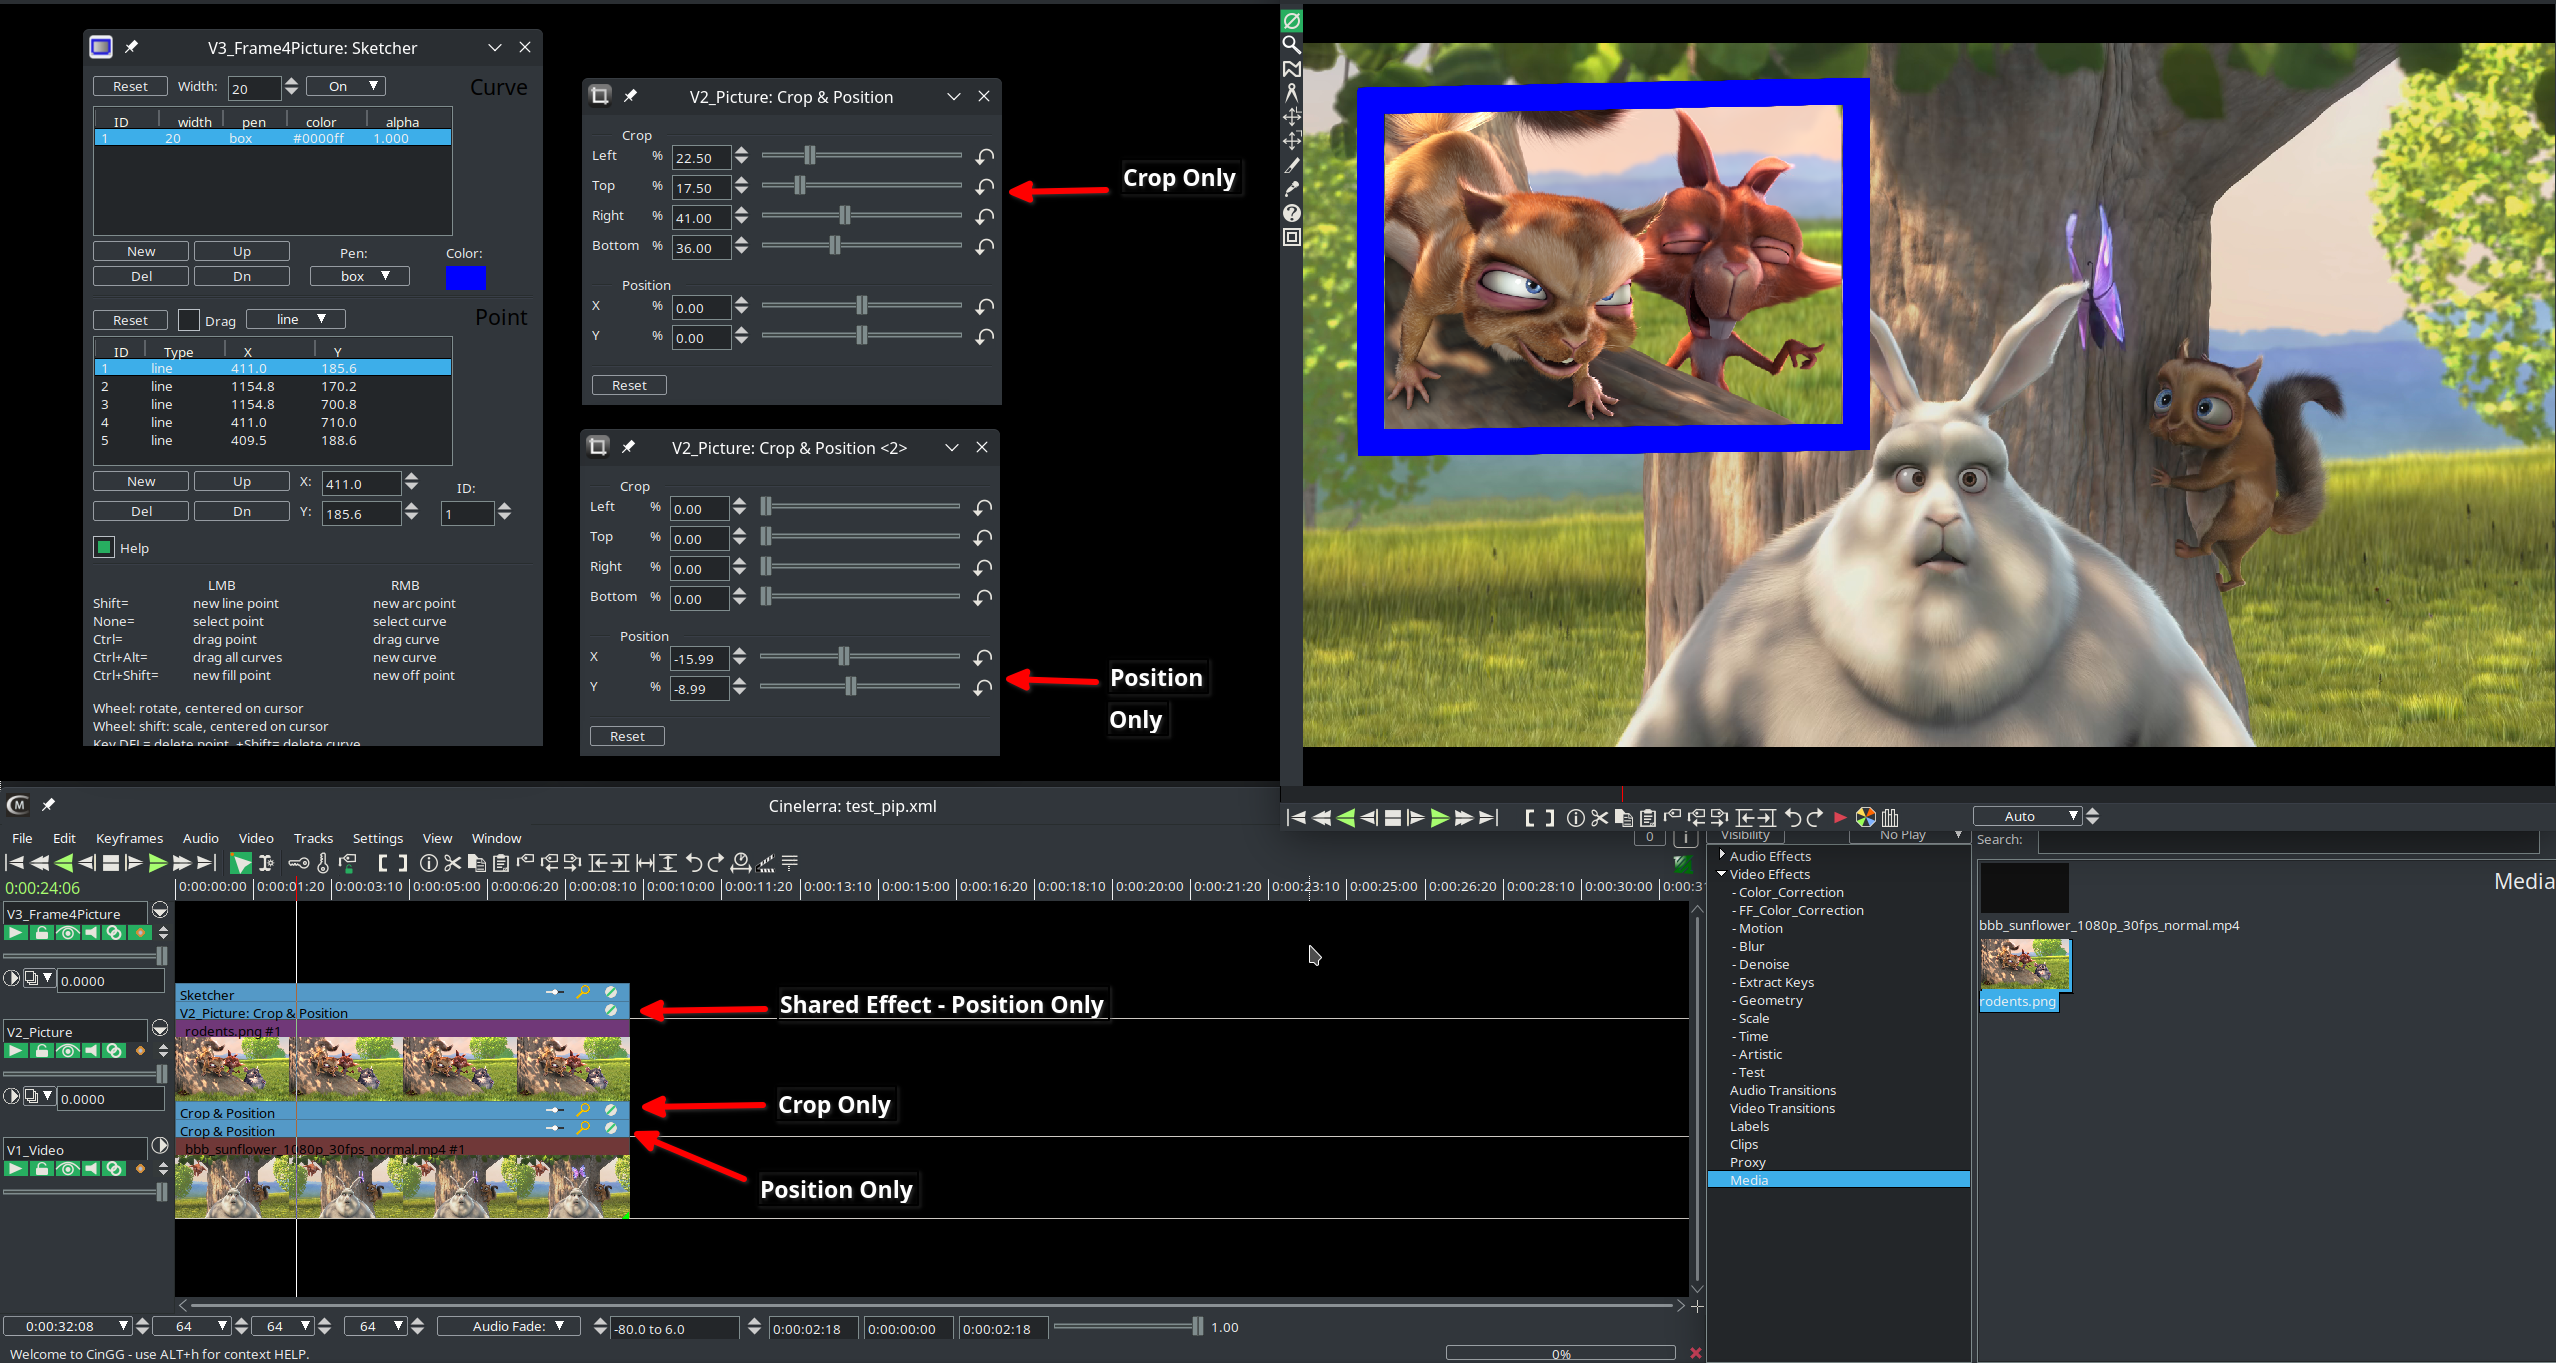
This is what the timeline should look like:
        - V3_Frame4Picture
                -> Sketcher
                -> Shared V2_Picture:Crop&Position (Position ONLY)
        - V2_Picture
                -> Rodents.png
                -> Crop&Position (Crop ONLY)
                -> Scale
                -> Crop&Position (Position ONLY)
        - V1_Video
                -> bbb_sunflower_1080p_30fps_normal.mp4
|
as you can see in figure D.9.
All that remains is to create the frame on the image that has already been cropped to the desired size. Drawing the frame with the Sketcher plugin is not difficult but requires precision. You can draw the 4 corner points imprecisely (Shift + LMB) and then arrange the created points by dragging them to exactly the right coordinates (Ctrl+LMB), or you can impose the coordinates on the 4 corner points by entering the exact numbers in the X and Y Input windows. You can also adjust the thickness of the frame and the color (see Sketcher).
If you want to move the PiP to another position you have to go back to Crop&Position (Position Only) and change the coordinates. Now you can see that the frame also moves along with the image thanks to the Shared effect present in the V3_Frame4Picture track, which returns the same coordinates to the Sketcher plugin.
Finally, you can animate the position of the PiP as well as the thickness and color of the frame throughout the video using the keyframes (see Keyframes).