Next: Use Case #1 – Up: Capturing and Recording Media Previous: The commercial DB Contents Index
If you want to transfer the data on a VHS tape, DVD disc, or Video8/Hi8 Tapes into CINELERRA-GG, you can do so by playing the media and recording while playing. This captures the media, which you are able to view as it plays, and writes it to a file so it can be played directly or edited. Because there is so much variation in hardware on both the Computer side and the Media Player side, these how to directions are only a guideline. You will most likely still have to do some experimentation and testing to see what works for you.
The basic strategy consists of 3 operations: connect the relevant outputs to representative inputs, configure the capture card to match the video, and start the Record monitor. Each of these may have to be experimented with to get them correct for your hardware setup.
Step 1: Connect both audio and video from your player hardware to the sound board and/or the capture card of your computer. Sometimes the capture card handles both audio and video but oftentimes audio and video are hooked up separately.
For example in a test case using the CX23418 capture card (an older/unusual single chip MPEG-2 encoder with integrated analog video/broadcast audio decoder), one end of an S-Video cable was plugged into the back of a DVD player and the other end plugged into this computer’s Capture card; the audio was plugged into the line in on the computer sound card.
Step 2: Setup CINELERRA-GG and it might be best the first time if you start with a default .bcast5 file by using a
command line from a window of
CIN_CONFIG=$HOME/bcast6 cinelerra_path/bin/cin
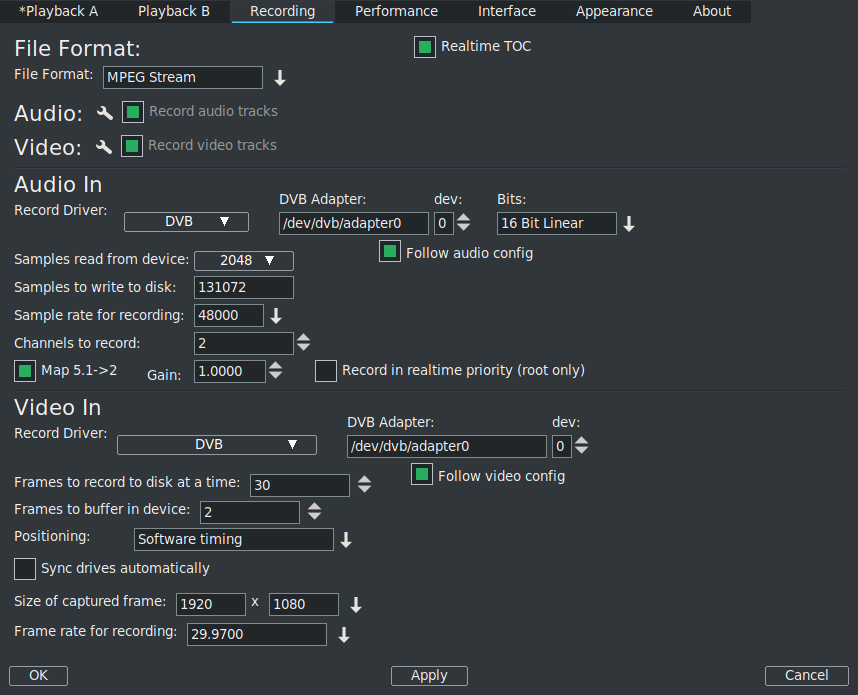
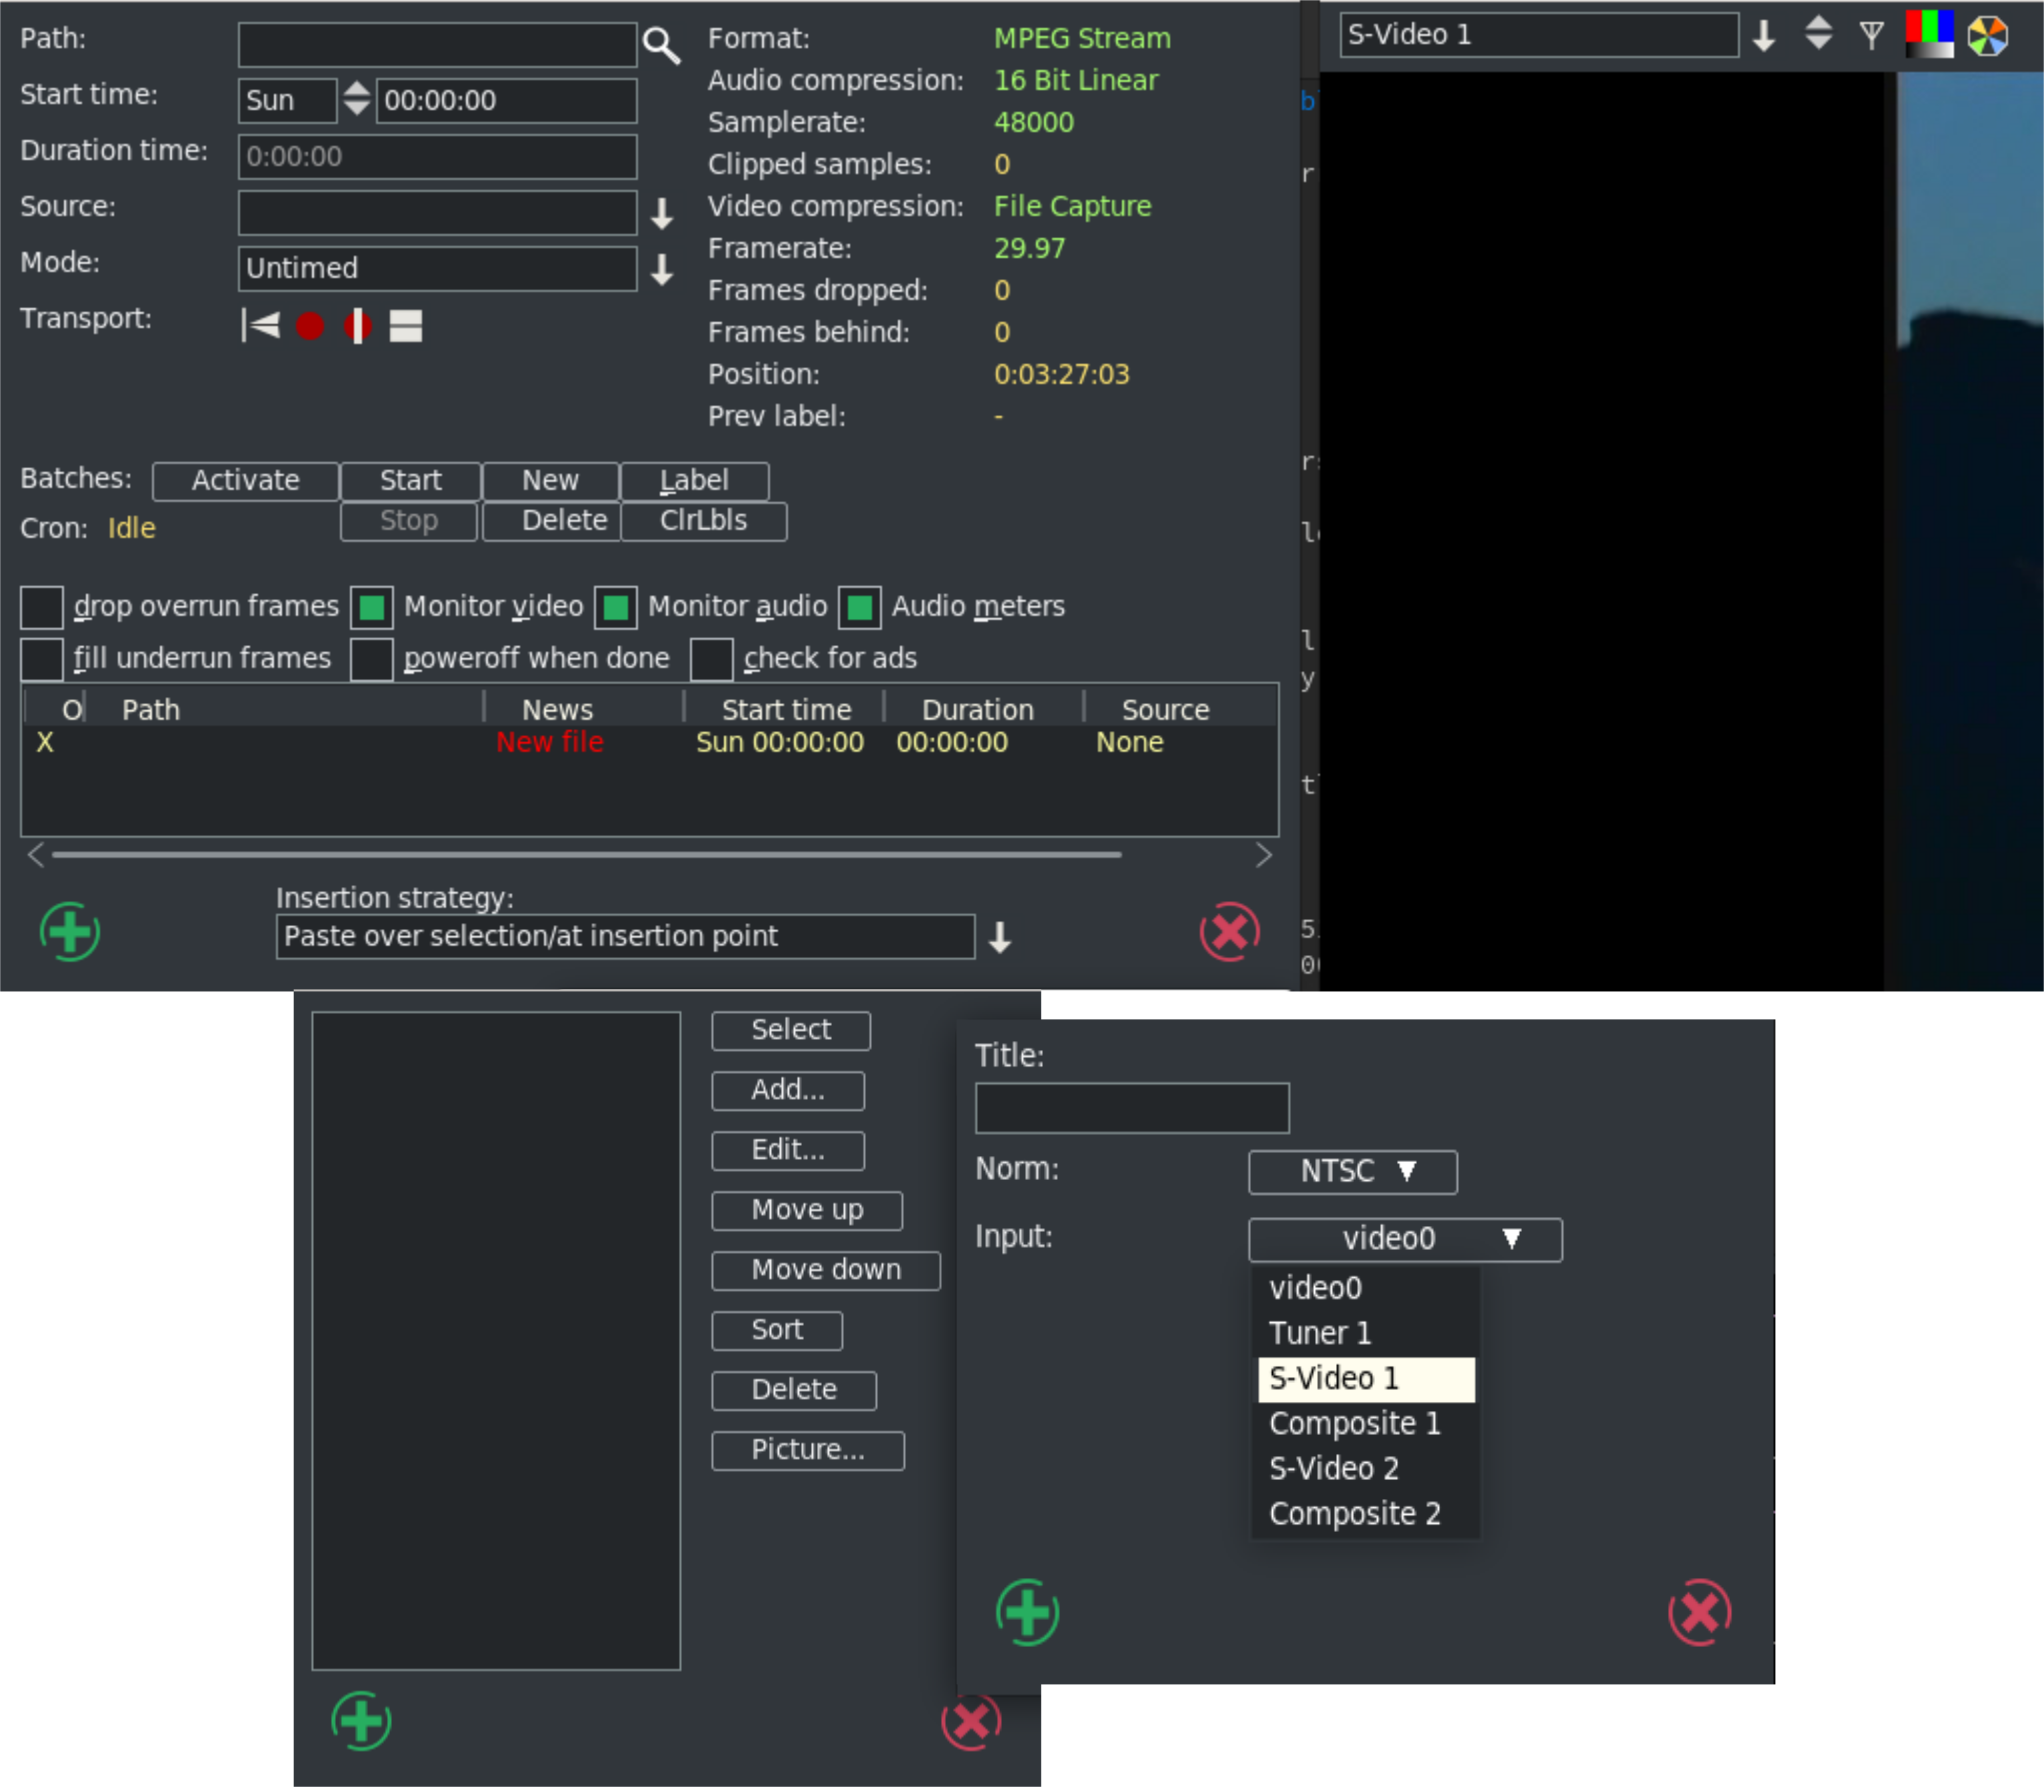
Step 3: Next use the File pulldown to choose Record and then the Recording menu will popup (figure 13.18).
There are many more parameters that you may want to vary in the Recording menu or for more details on various items, please refer to the section Record Web Media in real-time. The Transport buttons are well defined there also.
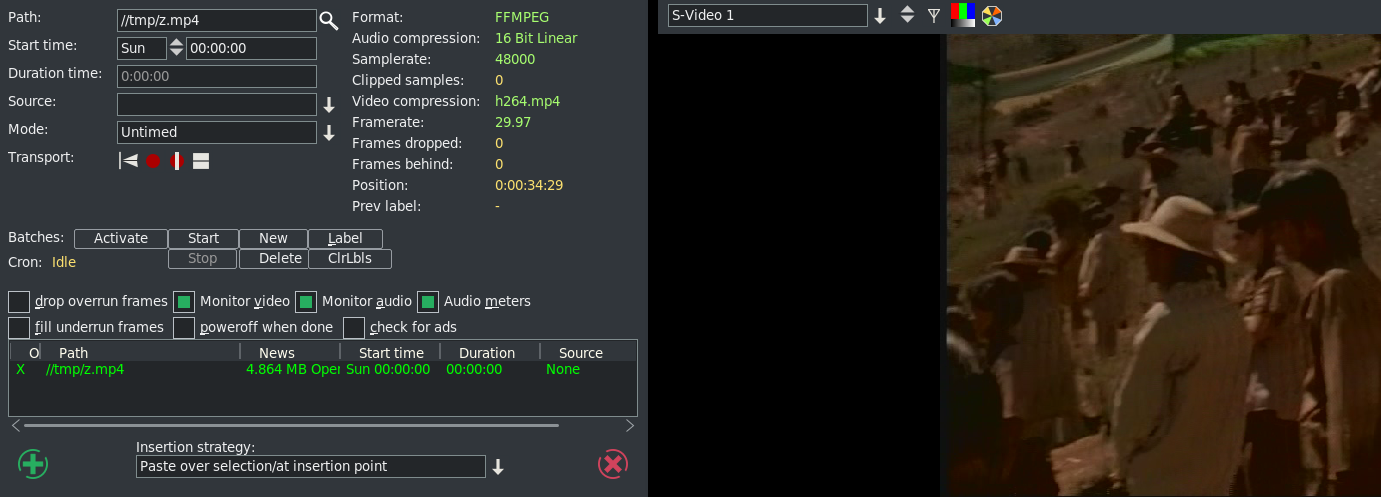
Step 4: When the media has finished playing, use the Stop icon on the Recording menu – the fourth icon next to the Transport label - to stop the recording (figure 13.19).
|
Now you can Load the file that you played and recorded via the Insertion strategy choices on the bottom of the Recording menu and edit the file as usual. Note, that the audio and video may have started at slightly different times so you might have to initially line them up at the beginning using nudge. Generally once they are correctly aligned they will stay that way. Nudge is in the expanded patchbay. The nudge value is the amount the track is shifted left or right during playback. The track is not displayed shifted on the timeline, but it is shifted when it is played back.