Next: Workflow with multi-cam and Up: Editing: real-world usage cases Previous: Editing: real-world usage cases Contents Index
This is a real world usage case1 that provides an excellent example of how OpenEDL has been a revolution for CINELERRA-GG. Advantages include: editing speed, clarity, ease of finding a specific item, and movement of a subject block via Nest to media. The main concept of editing using OpenEDL in this real world case is to reduce a large quantity of videos and shots to a few big clips by using an OpenEDL session for each clip. Using the OpenEDL timeline is similar to using the normal timeline: you can add effects, cut and drag, add or delete tracks, etc.
For more information on OpenEDL and Nested clips see sections 6.3 and 6.6.2.
Scenario setup consists of making one hour video using 3 different cameras:
Note: Camera 1 and 2 are both filming the same subject so the number of hours for the footage from these two cameras easily reaches 20 hours, but the final movie can only be one hour maximum. For this case, the final movie consists of all the subjects separated by camera 3 footage.
Workflow: OpenEDL is used throughout the editing process with the timeline reserved as the workspace. Basically, every time you have to work on a clip (consisting of one or more tracks), you use OpenEDL instead of the classic method of bringing each clip to the timeline, before doing the necessary Drag and Drop or Cut and Paste operations between different tracks. When finished with each OpenEDL clip session, save it outside of the OpenEDL layer at the top level of the main timeline.
See Video 1 (using French locale).
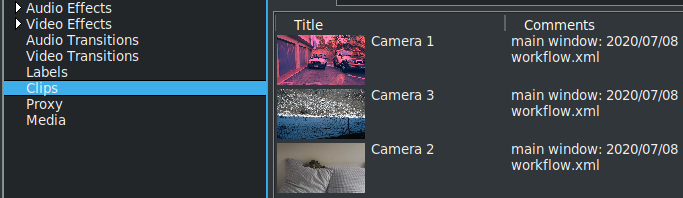
Camera 1 contains shots of Barcelona and Lisbon concert made by Camera 1.
Camera 2 contains shots of Barcelona and Lisbon concert made by Camera 2.
Camera 3 contains the images of the journey between the first subject and the second (e.g from Barcelona to Lisbon).
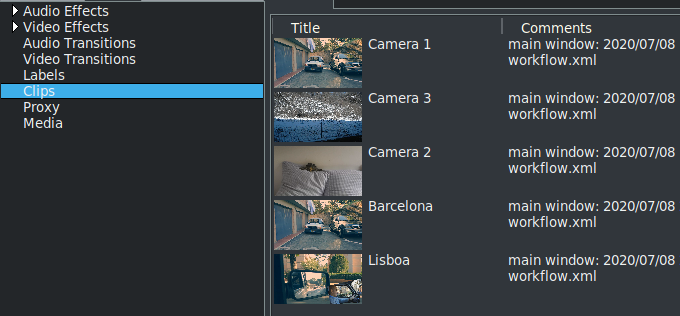
Next extract each common subject from the camera 1 & 2 footage and create a clip, for example - a place, a city, or a subject. In this case scenario, it is a concert in a specific city. You end up with as many clips as there are subjects (e.g. Barcelona & Lisbon). See figure D.2.
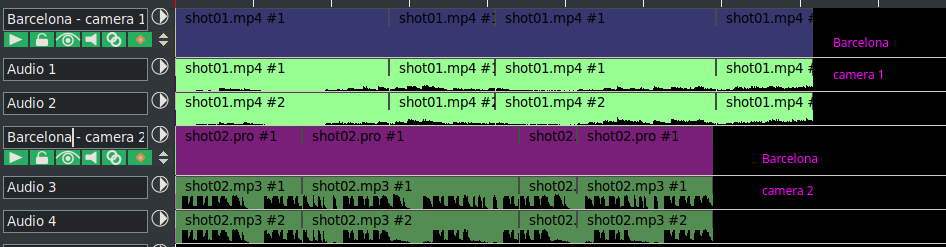
Each subject selected contains 2 video tracks and 4 audio tracks. See figure D.3 of a Barcelona clip.
Then edit each subject via OpenEDL. From the 2 tracks 1 & 4 (camera 1 & 2) you create a a single track (+ 2 audio tracks) as seen in figure D.4.
Next add the sound effects (such as birds or a water fountain) and video / audio effects for each subject; again via OpenEDL.
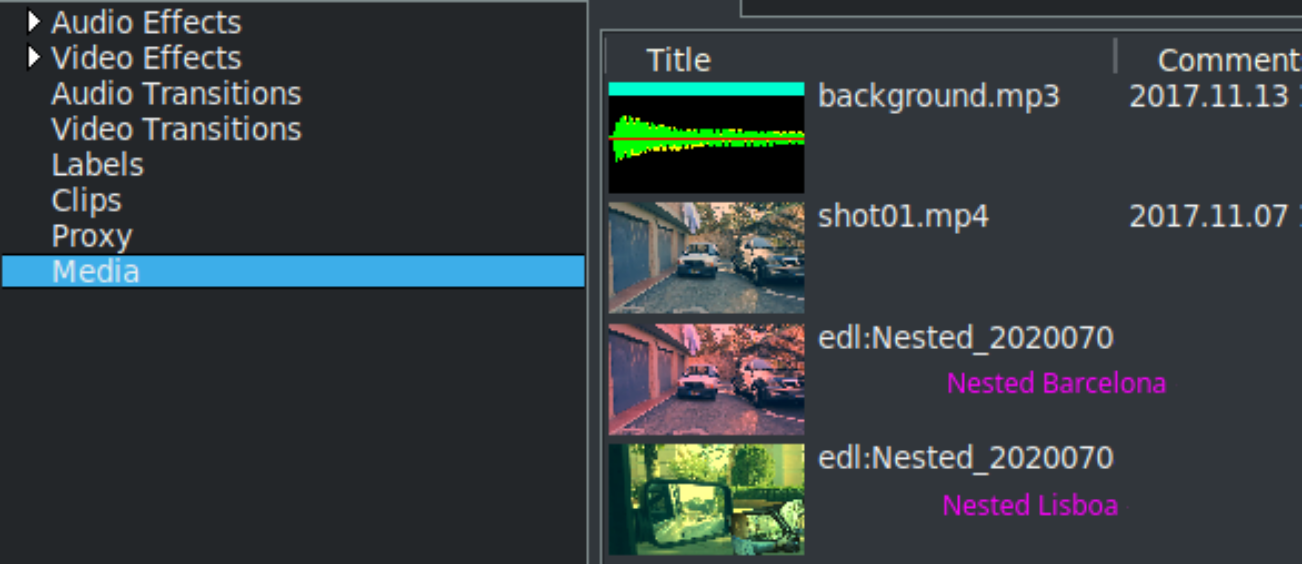
Each subject is converted to a nested clip by using the Nest to media option, making it a group.
The subject converted to a nested clip is automatically moved from the Clip folder to the Media folder. See figure D.5.
See Video 2 (using French locale).
Import each subject (Nested clip) on the main timeline. Converting using Nest to Media makes it easy to move and position each subject. You can move one subject after or before another.
Insert the retained shots coming from camera 3 between the different subjects.
See Video 3 (using French locale).
Add background music and comments.
At this stage, each subject can still be edited and undergo any modification via OpenEDL (again ... and always)
All that remains is mastering the video with a render.
Ordinarily it it is very difficult to set up such a project but using tools such as OpenEDL and Nested clips makes it quite easy. These tools, in many cases, are essential and become standards for the development of important projects using CINELERRA-GG.
Once converted to nest to media the clips disappear from the clips folder to end up in the media folder. You can always, if you wish to recover it in the clips folder do so via the EDL to clip menu. In this case, the name of the clip can change but the reference of the clip can be found in the comment of the clip.
See Video 4 (using French locale).