User Folders/Bins
Creating folders that are more specific to a particular project is helpful in better organizing your work.
This can be done by utilizing the files already loaded to the master Media or Clips folders in the Resources window. The general rule is you can only drag clips to a ClipUserBin and you can only drag media to a MediaUserBin. No subfolders can be created within the new folders. Further below, after we populate the new folder, we will see how to use logical operators or other filters to automatically sort the media.
Below are steps illustrating an easy way to set up a new folder.
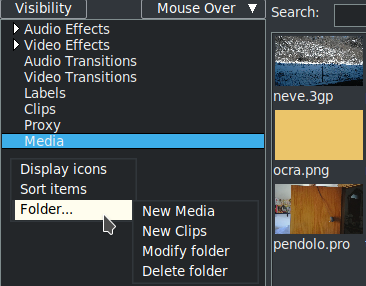
- In the Resources window (figure 2.26), in the location of the Video/Audio effects and Media folders, bring up the Folder... popup by clicking the right mouse button. Highlight, then click New Media or New Clips. Modify folder can be used to change the name of a folder. Delete folder can be used to delete a folder.
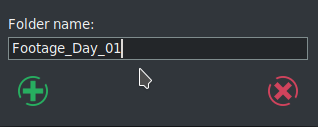
- In the New folder popup as shown below (figure 2.27), type in your folder name in the textbox. Click OK.
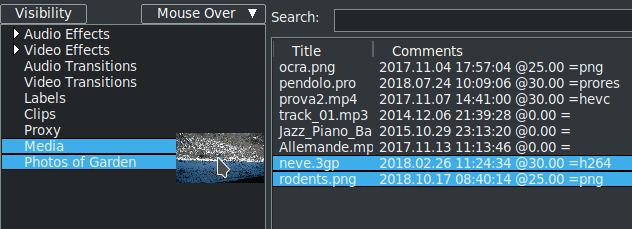
- Select the master Media folder to see which files are currently loaded, figure 2.28. Highlight the files there that you want to copy to your new folder (named Photos of Garden). Drag the files to the left and when you see the Photos of Garden folder become highlighted, then drop there. You can drag and drop any of the media from the master Media at any time. It flashes when the drop is successful.
Figure 2.26:
New folder menu
|
|
Figure 2.28:
The 'master' Media folder
|
|
The CINELERRA-GG Community, 2021
https://www.cinelerra-gg.org