Next: Output Terminal Messages from Up: CinelerraGG_Manual Previous: Use Case #2 – Contents Index
This section describes how to create a blu-ray DVD, or BD referring to a Blu-ray DVD, and a regular DVD, or SD referring to a Standard DVD. The DVDs (plural usage of DVD means either BD or SD) created are unencrypted, unlike commercially available movie DVDs. This CINELERRA-GG version conceivably can create different variations of DVD/Blu-ray media but for the casual user the most standard usages are readily usable and will be described here. In CINELERRA-GG DVD and Bluray creation is a convenience for users who want to edit and then just make basic media without having to work too hard, therefore all features will not be available.
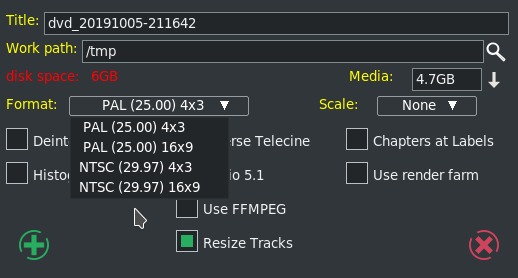
Some preliminary information follows. For NTSC, SD media is almost always 720×480 interlaced (the format in the United States, US). For PAL, SD media is almost always 720×576 interlaced (Europe, EU, and most of the world). An SD can conceivably be created with a lower resolution – for example 352×240 MPEG-1 – but it is not useful. Aspect ratio for either NTSC or PAL can be 4 : 3 or 16 : 9.
Frames per seconds is usually 29.97 for NTSC and 25 fps for PAL. The standard SD dvd generally uses the MPEG-2 program stream with a filename extension of m2v. BD blu-ray media is not normally interlaced, but you can leave it interlaced. Blu-ray uses the MPEG transport stream which contains 1 or more program streams with a default filename extension of m2ts.
Requirements for creating DVDs is the hardware device to write the media on and, obviously, the blank media for either BD or SD. When generating SD media, you will have to install dvdauthor and for BD media, install udftools if they are not on your system. Also, keep in mind that to mount filesystems for creating files and to burn DVDs, you will have to be root since you have to have privileges, unless special permissions have been provided for a non-root user. It is also highly recommended to run the CINELERRA-GG startup from a terminal window, instead of the icon, in order to see informative messages of how to actually write the output (at prompt: keyin <install_directory_path/bin/cin or <install_directory_path/<your_version>.AppImage).
A warning here – writing blu-ray BDs and regular SDs can take a large amount of clock time. Keep in mind that a blu-ray can contain 25 hours of viewing, so would take multiple hours to just write one.
The amount of data you have to render determines the amount of disk space you will need for working. The max disk space needed for a completely full media disc is a little over 100GB for 50GB Double Layer (DL) media or 50GB for a single layer BD blu-ray. A standard SD of 4.7GB needs about 10GB disk space. You will need much less if the render for blu-ray is less than 25 hours of media. Generally you will need twice as much disk space as will be written on the media to ensure you have sufficient space for working and copying.
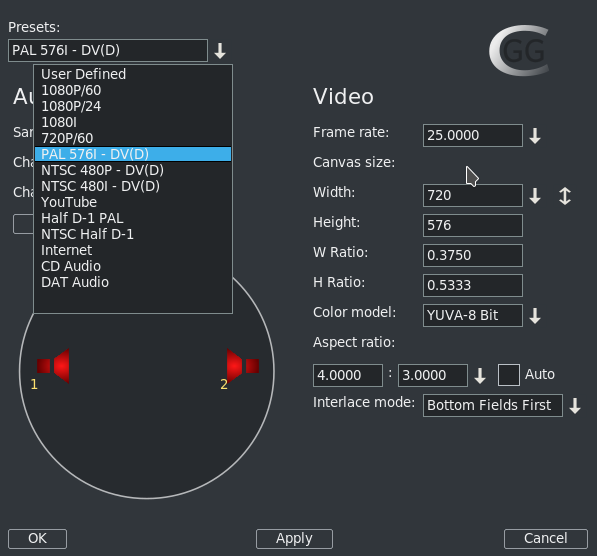
The most important thing you need to know about in order to get started is Format and Scale in the Create dvd or bd window. Format settings shown in the Set Format window are set accordingly to an algorithm. Basically, it will take whatever you say in the asset format. It matches that against the known Presets available so that is what will be shown. If the asset format doesn't match any of the Presets default formats, then that will be shown as the User Defined format. In addition when you load media, the format is initially set to same as source so matches the source input and if that matches a known preset, then that is what is shown. The PAL versus NTSC only comes into play when there is no known correct matching format when you attempt to create a DVD Render batch job. It is applied when you click OK. For example, if you load up a YouTube video, it will not match any known format and will choose PAL or NTSC based on time zone.
Figure 14.1 shows pulldown Presets in Set Format window:
A quick set of basic steps to create DVDs is immediately below and usually just using the defaults will get you something. However there is a serious issue with interaction between the Operating System and bdwrite when creating a BD/blu-ray that requires automount to be turned off. For more details on using automount see: 14.8.
Any problems encountered will require that you read more information in this section to include specific details, helpful hints, and problem resolution.
The general design of the DVD/blu-ray generation operations is to first render media using batch rendering and then terminate CINELERRA-GG to start a script which creates the target device filesystem data. These scripts are the dvd.sh and bd.sh scripts written into the target directory. For DVD, the general plan is to write a directory <target>/iso with the dvd filesystem via dvdauthor and then generate an iso9660 filesystem and write it to a dvd via growisofs.
For blu-ray, the filesystem generation is slightly harder. First, it creates an empty filesystem image <target>/bd.udfs using mkudffs which makes a big hole for the filesystem data. The hole is made just a little bigger than the data written by bdwrite so that you don't have to write an entire 25GB or 50GB disc even if no data exists. The actual calculation for the mkudffs size is yourfile.m2ts size-in-bytes/2048 + 4096. This empty filesystem is loopback mounted to make it writable, and the linux kernel manages the filesystem image. The bdwrite program applies the blu-ray structure to the UDF filesystem by creating the needed BDMV blu-ray filesystem, which the kernel stores onto the image file bd.udfs. When udfs is unmounted, the kernel finalizes the disk image on bd.udfs. The bd.udfs image can be written directly to a blu-ray disk via dd or growisofs.
NOTE of IMPORTANCE: there is a serious situation with the interaction between the Operating System (OS) and bdwrite when creating blu-ray, that requires automount to be turned off. The blu-ray automatic script unmounts the blu-ray/UDF filesystem but the system has not finalized the directories so the OS creates a new loop file device and the data is loaded and cached for use by the new loop but it is stale. Consequences is that not all of the data is written where it should be. The solution is for the OS not to mount this second mount so we have to make sure it doesn't. There are 2 methods to fix this. The first and easiest is by using the following command to disable automount:
gsettings set org.gnome.desktop.media-handling automount false |
This can be reversed when you have completed the blu-ray generation via:
gsettings set org.gnome.desktop.media-handling automount true |
A different and more complicated method you can use to turn off automount is to download and install the dconf-editor. Automount is a system parameter and only needs to be done once unless you do not want automounts to always be disabled.
Immediately below are the detailed steps with explanations for creating SD or BD media.
Step 1: Construct a session with the desired presentation:
Step 2: From the main window, select file → BD Render or select file → DVD Render (figure 14.2). Then:
(Note: both the BD and the DVD windows above, show insufficient space, disk space: in red)
Explanation of the choice boxes as seen in figure 14.2 for both SD and BD menus is given below. Many of them are plugins which allow you to further manipulate the settings for best results. They are just suggestions set by the program automatically based on your input media, and can be reset to suit your needs. These are listed in the next 4 points.
All of the current choice boxes are further defined immediately following.
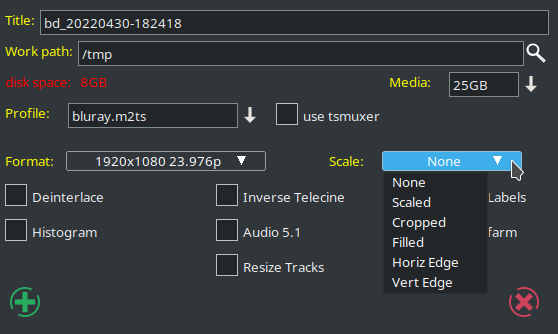
Figure 14.3 shows on the upper right side the Create DVD window with Deinterlace, Histogram and Resize Tracks checked. Also Scale is set to Scaled. Once the green checkmark is clicked, the Batch Render window comes up and in the main window you will see the 3 plugins below the video track on the main window. By clicking on the magnifying glass that appears on the rightmost side, the controls for each will popup and you can make any necessary adjustments. Note the numerous choices for Deinterlace; the Value, Red, Green, and Blue for color adjustments in the Histogram window; and Scale Ratio popup menu for numerical settings control.
The Scale parameter gives you a lot of flexibility. A default based on your input media is provided for you but possible choices are None, Scaled, Cropped, Filled, Horiz Edge, and Vert Edge. You will have the opportunity to manipulate the desired results in the Scale Ratio window. Values for W (width), H (height), and X/Y coordinates are the number of pixels. For example, if video is 720×432, that is obviously 720 pixels by 432 pixels and this would be the values for Dst W and for Dst H. So if you have some media that is off center you can crop by changing the SRC Y value AND then change DST X/Y to non-zero. It will become the output origin. To see what it does, change them from 0.0 to 400.0 and you will see big changes in the compositor window.
For example, if you have the Cropped choice for the Scale, you will want to manipulate the ScaleRatio plugin (the magnifying glass on the main window video track) which brings up the Scale window. For cropped top instead of crop both top and bottom, modify the Src Y. As you change the Y scale, you will see the cropping take place in the Compositor.
Scaling options are provided in order to preserve image aspect ratio. To determine which scaling option to use, it is important to correctly identify your source/destination video aspect ratios. Next is a short explanation of possible options.
Horizontal and Vertical are duplicates or restatement of same functionality as Cropped or Filled but are provided as options to accommodate different ways of thinking. In any case, you can choose which outer edges of the image to crop by using the Show Controls of the Scale Ratio plugin. For example, you can ensure that no action is lost by displaying the center of the screen only or making sure that any textual information on the bottom is not lost by cutting only the top off.
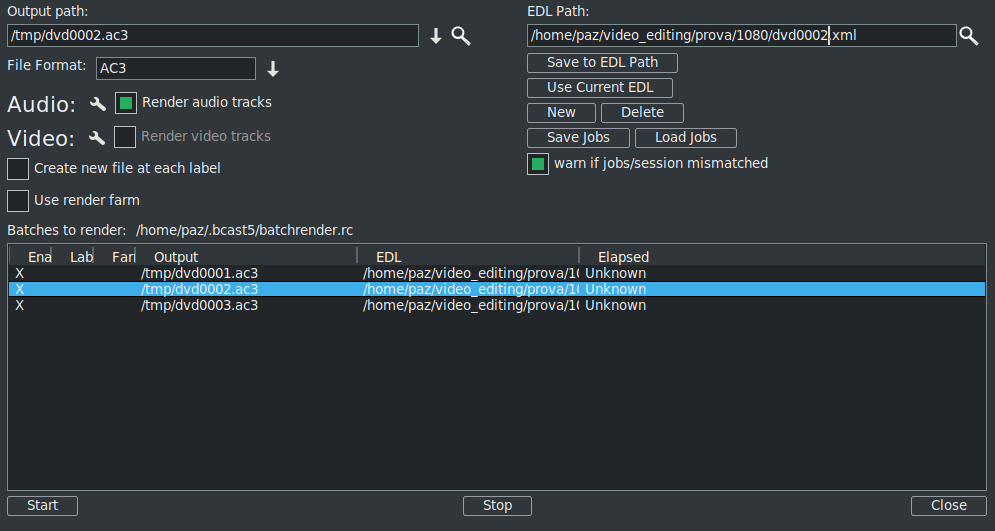
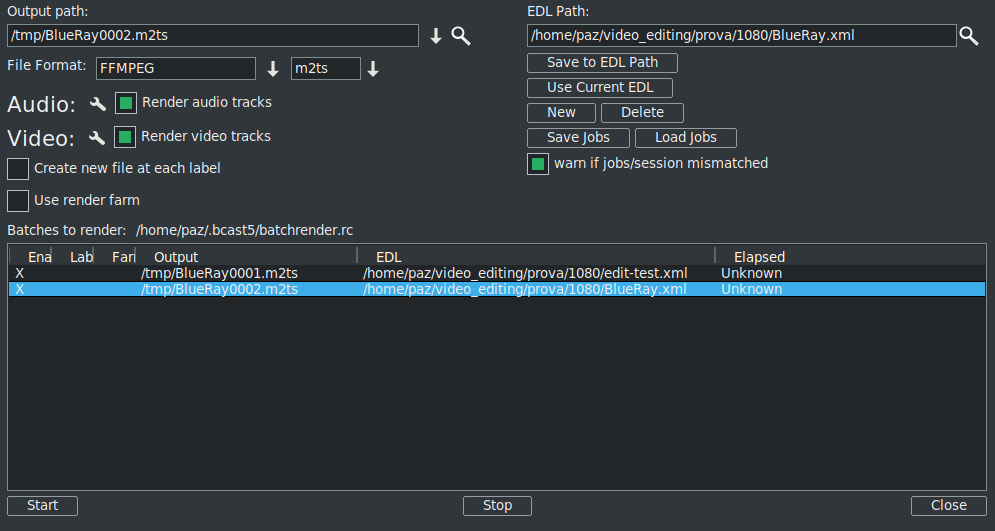
Step 3: Batch render menu appears with m2ts format selected for blu-ray or dvd format selected for regular/standard DVD when File Format selected is ffmpeg in the previous Create DVD menu. It will work just fine without selecting ffmpeg for DVD and may be advantageous not to. Using the audio/video wrench tools (you will have to have the video batch job highlighted to manipulate the video or audio batch job for audio).
The default bitrate is the largest value possible. The actual target bitrate is calculated based on a formula from the blu-ray/DVD code. It divides the media size (in bits) by the video time (in seconds) to find the bitrate that will just fit on the target media. This could create a weird bitrate if the media is large, and the video time is small, so the default/target bitrate is limited to 10Mb/s.Batch jobs are then built and appended to the job list. Once these batch jobs are built, if you make any changes, you have to start over. You will see listed the batch jobs that are created to perform the rendering/tasks – 2 jobs for blu-ray, one for audio/video processing and one for the scripts. There will be 3 batch jobs created for DVD when not using ffmpeg to include one each for audio and video and then one more for the scripts. When you click on start, it fires off those jobs and you will see the rendering main window progress bar in the bottom corner reflecting the fact that it is currently processing. Be aware that the CINELERRA-GG program will be totally shutdown AFTER the batch jobs finish.
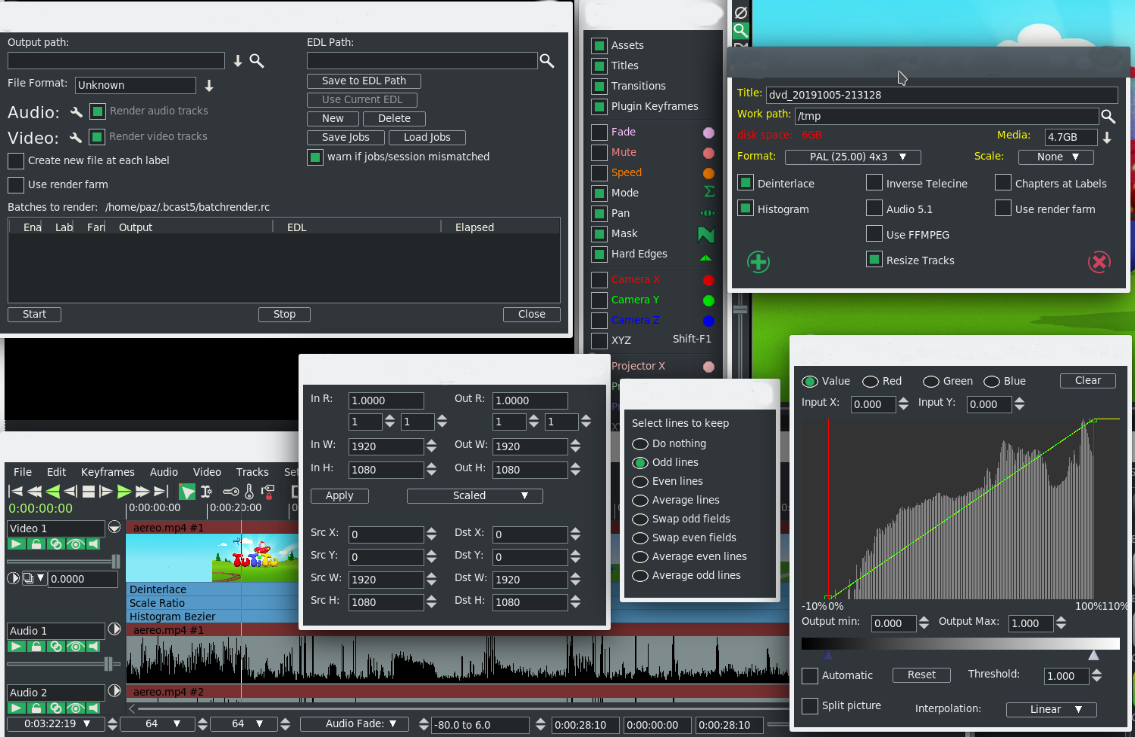
Figure 14.4 for DVD and Figure 14.5 for BD show creation renders with batch jobs queued up and ready to be started. Note that because it is not ffmpeg, the processing of video is done separately from audio. If you need to modify the video tracks, which you can see is ghosted out, you need to highlight the first batch job listed. Be sure to highlight the first batch job before pressing Start so it runs all of the jobs and be sure the X for job enabled is set.
When you click on start, it fires off those jobs and you will see the rendering main window progress bar in the bottom corner reflecting the fact that it is currently processing. Be aware that the CINELERRA-GG program will be totally shutdown after the batch jobs finish and you will be at the command line prompt.
This will produce a new directory in your target path which contains a filesystem image file.
For example:
/<target directory>/bd_(or dvd_)<date-time>/
Directory and file names should not be changed at this time because the scripts and programs rely on the given names in order to proceed. You can change them later for your own purposes.
If bluray to test the filesystem you just created, use the command line interface; loopback mount the filesystem image which was generated in the target directory. For example if blu-ray:
cd /<target directory>/bd_(or dvd_)<date-time>/ mount -o loop,ro ./bd.udfs ./udfs #check the media using a compatible media rendering tool like ffplay umount ./udfs... |
To burn blu-ray media you will need to run from the command line interface. In the examples below, /dev/bd represents your blu-ray writer device (for example: /dev/sr1) and /dev/dvd represents your dvd writer device (for example: /dev/sr0).
For rewritable blu-ray (recommended) (BD-RE):
Note: new or previously unwritten media must be formatted first using:
dvd+rw-format /dev/bd #only done once and does not take very long |
To write or rewrite rewritable blu-ray media:
cd /<target directory>/bd_(or dvd_)<date-time>/ dd if=./bd.udfs of=/dev/bd bs=2048000 #the growisofs command below also works |
To write blu-ray write-once media: (BD-R) (no pre-formatting needed):
cd /<target directory>/bd_(or dvd_)<date-time>/ growisofs -dvd-compat -Z /dev/bd=./bd.udfs |
For rewritable DVD (DVD+RW):
Note: unwritten media must be formatted first using:
dvd+rw-format /dev/dvd #only done once and does not take very long |
To write a DVD, load blank media and run the following from the command line (requires dvdauthor):
cd /<target directory>/bd_(or dvd_)<date-time>/ growisofs -dvd-compat -Z /dev/dvd -dvd-video ./iso |
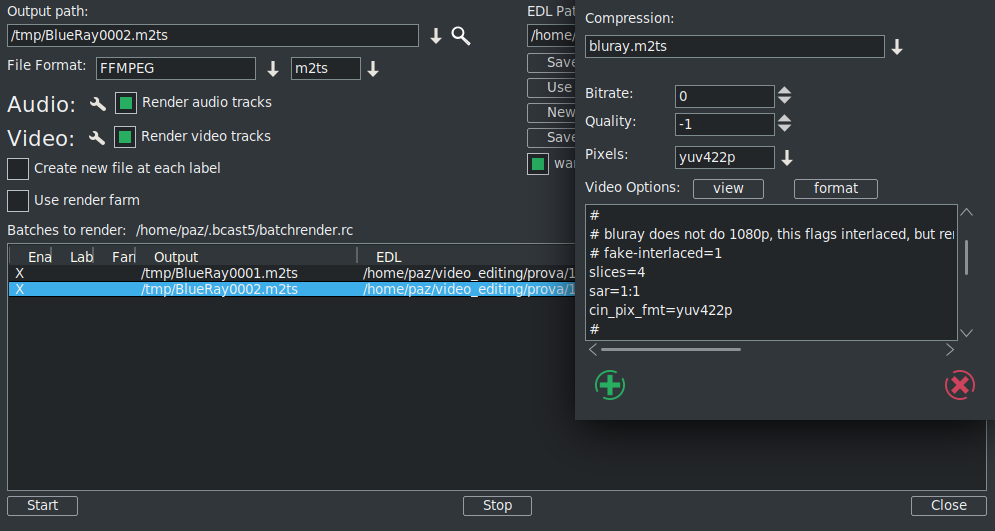
Figure 14.6 shows the availability of 4:2 :2 for a Batch Render seen by clicking on wrench icon.
Figure 14.7 shows the availability of 10-bit high quality 4:2 :2 for a Batch Render seen by clicking on wrench icon. You need specially compiled CINELERRA-GG in order to use the x265 10-bit as opposed to 8-bit.